You may be asking, “Why should I update and maintain my WordPress site?”
WordPress releases software updates on a regular basis, which is why it’s important to maintain your site. There is no such thing as setting it and forgetting it. Here are the top reasons as to why your website should be updated regularly:
- Security – Hackers are often finding new and creative ways to gain access to websites. A hacked website can be especially concerning if you use your site to collect personal data about your customers (for example, if you sell products or collect email addresses through your website). It is extremely important to keep your site updated to protect your site and your customers’ information.
- Bugs – Like any software, WordPress sometimes has bugs or problems that need to be repaired. These are often overlooked until they are reported by users like you. By upgrading regularly, you can ensure that these bugs will not be a problem.
- Improvements & upgrades – The web is constantly changing as new technologies are developed. It is important to keep your site maintained so you can take advantage of all that WordPress has to offer. Upgrading regularly will also ensure that your site is updated to the latest coding standards. Outdated code can affect your rankings in search engines, impact your website speed, and over time, can even break your site completely. (This often happens if the code on your site is so old that it becomes incompatible with your web host’s server.)
Software isn’t the only thing you should be updating on your website. It is also important to keep your content fresh. Updating the information on your site will not only ensure that your content is current and correct, but can also impact your visibility in search engines like Google. Search engine algorithms often assign more importance to sites with updated or new content. Some examples of updates you may want to make on your site include:
- Updating the copyright year (this often gets overlooked)
- Adding new blog posts or news entries
- Updating your business hours, locations or contact information
- Updating photos or copy on the website
- Adding new relevant information (An example: You learn that new customers are having trouble finding parking near your establishment, and as a result, you are losing potential business. Perhaps you can add instructions or directions on your contact page to let customers know where they can find parking nearby.)
So how do you ensure you stay up-to-date and compliant?
Step 1 – Create a maintenance schedule and stick to it
Updates to the WordPress software, plugins and themes will typically be available on a monthly basis. For this reason, you should perform backups and software updates to your site on a monthly or bi-monthly basis.
You may want to create a similar schedule for updating content, or you may prefer to add content more frequently (for instance if you are maintaining a blog, e-zine or newsfeed).
Step 2 – Backup your website (a crucial step)
Before making any changes to your site, you should run a complete backup. (This backup should include your site files and the database.) It is not uncommon for updates to cause problems. If you backup your site before performing upgrades you (or your web host) will be able to restore the site if any problems occur.
Most web hosts will provide you with tools to perform your own backup. cPanel hosting comes with built-in backup options for downloading a separate backup for your site files and your database.
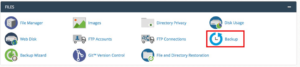
cPanel with backup options

Directory backup
If you use a managed WordPress hosting plan (for example GoDaddy’s WordPress plan), you may need to purchase a backup plan from your web host. In the case that your host is doing regular backups for you, they should provide you with a set of tools to restore those backups (or they should be able to restore them for you).
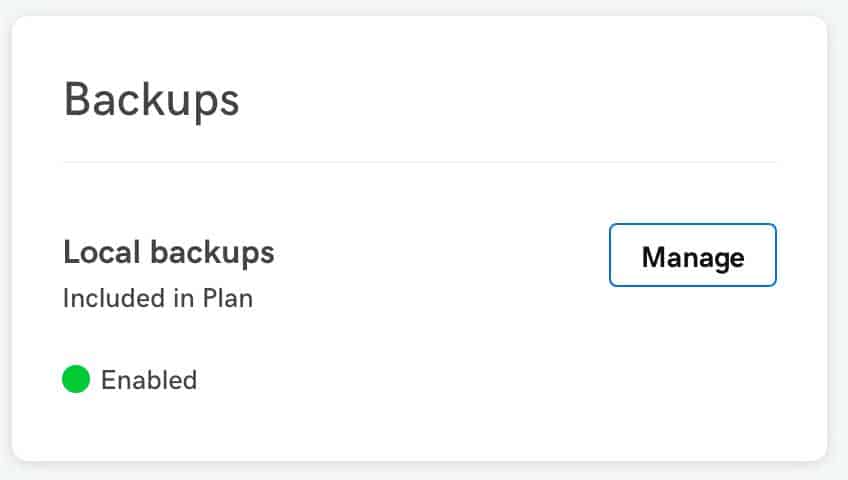
GoDaddy WordPress backup
If none of these options are available, you can try installing a WordPress plugin to run backups of your site (for example, Updraft). We only suggest this method as a last resort because running backups from a plugin will use an excessive amount of bandwidth and memory and can cause your site to run extremely slowly or to go down completely. Excessive bandwidth usage can also cause your site to exceed your host’s bandwidth/memory limits and may require you to upgrade your hosting plan to a more expensive VPS or Dedicated server.
Step 3 – Update WordPress software
It is usually best to first upgrade the WordPress software itself before performing updates on your WordPress theme and plugins. Theme and plugin upgrades are often interdependent on the updates that are released for WordPress.
Step 4 – Update WordPress plugins
After your WordPress upgrades are completed successfully, you can begin updating your WordPress plugins. Sometimes these updates can take several minutes to complete and you may be unable to access your website temporarily while they are in progress.
Step 5 – Update WordPress theme
The process for updating your WordPress theme will vary depending on from where you purchased or downloaded your theme. If you are using one of the free themes that WordPress provides, you should be able to apply theme updates right from your site.
If you purchased a theme through a theme developer (for example, ThemeForest), you may need to log into your account with that developer and check to see if any updates are available for the theme you purchased. You may need to download the updated version to your computer and reinstall it on your site (either by deleting the old theme and uploading a new one through the WordPress interface or by replacing the theme files via FTP or cPanel).
Step 6 – Clear website cache
If you are using a WordPress caching plugin to speed up your site, you may need to clear your website cache before any of your changes will be visible. These plugins will usually add a button in the WordPress toolbar at the top of your website so you can quickly clear the cache and refresh the site. (Note: If you have a managed WordPress hosting plan with GoDaddy, the caching plugin will be enabled by default and cannot be disabled or removed. You will need to clear the cache any time you make changes to your site to see the most current revisions.)
In addition to clearing the cache on your site, you should also clear your browser history and cache. All major browsers (Chrome, Firefox, Safari, Internet Explorer, etc.) will create a temporary cache of websites you have visited in the past so these sites will load faster when you visit them in the future. This caching can prevent you from immediately seeing the newest updates to your site. By clearing your browsing history, you can ensure you will be seeing the most current version of your site. This is especially important for the next step—testing your changes.
Step 7 – Test changes
After you have completed your upgrades and cleared your cache, you should check your site carefully for any problems with the display and functionality of the site. Upgrades can have their own bugs or problems, and sometimes themes and plugins can even have conflicts with each other. It is important to test your site thoroughly on both mobile and desktop devices to ensure all aspects of the site are displaying and functioning properly.
Step 8 – Troubleshooting problems
If you find that something on your site is broken after running an upgrade, you can perform the following steps to troubleshoot the cause of the issue:
- Try disabling your plugins one at a time. If disabling a plugin fixes the problem, it is likely that the plugin has a conflict with either your theme or another plugin on your site. It is also possible that the plugin has a bug. You can try restoring the old version of the plugin from your backups by uploading the files via FTP, or you can disable the plugin completely and replace it with a different plugin.
- If you are still experiencing problems after running an update, you can also try temporarily switching your WordPress theme to one of the default WordPress themes. If this fixes the issue, then the problem might be caused by a bug or conflict with your theme. You can try restoring the old theme files from your backup by uploading them via FTP.
- If you are still experiencing a problem with your site, you may need to restore a backup of your site and contact a professional web developer for assistance.
Step 9 – Update content
After your website is updated and working properly, you can begin adding and updating your copy, images, posts and pages. We suggest waiting to take this step until you have completed your WordPress upgrades in the event that you would need to restore a backup of your older site (so you won’t overwrite your own changes).
If you are adding new content, you will probably also be removing or replacing old content. It is important to delete images, plugins, themes, pages, and files from your site that you are no longer using. Over the years, this ‘junk’ content can build-up and use a lot of storage space. If you use more storage space than your hosting plan allows, your web host may require you to upgrade your hosting plan or pay more for additional disk space. Being vigilant about removing unused content, can save you money and a lot of extra hassle in the future.
Step 10 – Test again
Clear your website and browser caches again and test the site thoroughly on mobile and desktop devices to ensure your changes are working consistently.
Additional tips
- If you don’t already use a caching plugin to speed up your site, you should consider installing one. Try WP Super Cache for a simple solution.
- WordPress is a popular platform for websites, and as a result, it is also a popular target for hackers. Consider using an extremely secure password for your WordPress login, and consider adding the Wordfence firewall plugin to help protect your site from attackers.
- Use as few plugins as possible. The more plugins you add to your site, the longer the site will take to load for visitors. Plugins can also have conflicts with each other and having too many may make it more difficult for you to troubleshoot problems with your site.
Stay up-to-date with our latest posts by following globalHMA.com!
